1. Welcome to the Dark
You lead a warren of monsters hiding from a world that wants you dead. Pigloids in nearby settlements will find you, muster fighters, and send waves against your Home Nest. If the nest falls, the run ends.
You survive — and eventually win — by doing three things in parallel:
- Growing your Nest — more monsters, more food, better buildings.
- Expanding your territory — claim or corrupt hexes to encircle settlements.
- Sending out raids — cull settlements before they can mount a serious wave.
There is exactly one win condition, and it has a name: cage the ☠ Prime Target — the strongest settlement on the map, out at the far rim, marked on the map itself with a hovering gold marker — and then survive the final wave, which every settlement still standing marches in.
The final page of this guide spells out exactly how a run is won. Use the dots below or Next/Prev to move through the guide.
2. The Nest: Burrows & Food
Your Home Nest hosts your buildings. Two are the backbone of every run:
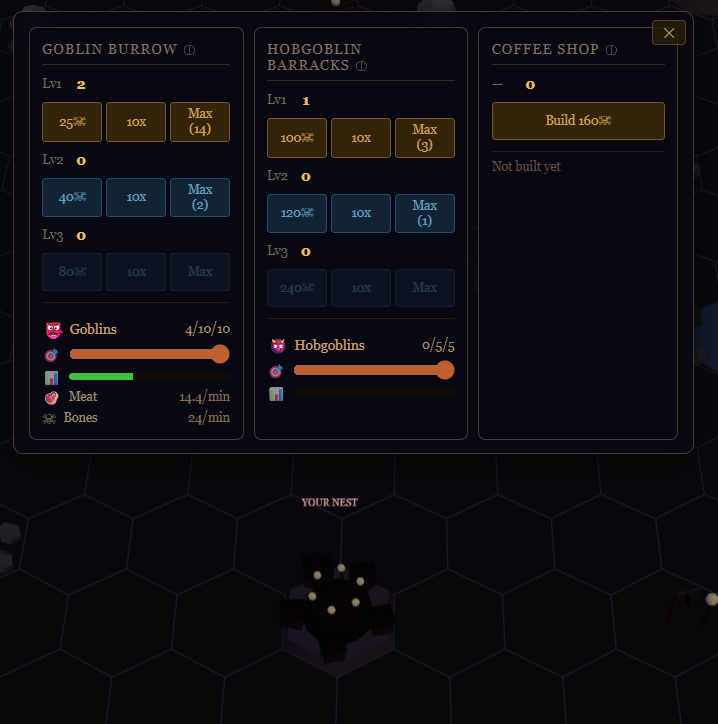
- Goblin Burrow — spawns goblins and produces raw Meat and Bones. Goblins are your workforce: they staff every other building and go on raids. Upgrading a Burrow hatches faster, roughly doubles what its goblins produce, and houses 3 more of them; buying more Burrows (up to the cap) is the other half of scaling your population.
- Tavern — cooks raw meat into Grilled Meat, roughly 1.5× the satiation per unit of raw. If you feed monsters raw meat you're leaving hunger on the table.
Every monster gets hungry over time. A hungry monster fights worse; a starving one dies. Watch the fullness bars in the population panel on the left — if they're trending red, you need more Burrows, more Tavern throughput, or fewer mouths.
Every building card carries an ⓘ next to its name. That opens a page about that building alone — what it makes, what it costs to staff, and when it stops being worth upgrading. When you are not sure whether to buy one more of something, read its ⓘ first.
Later buildings plug into the same loop from both ends. Bodies from raids and combat go to the Graveyard, which renders them into meat, bones, ghouls, blood for vampires and organs for the Brewery. Bones go to the Bone Mill and on to the Bonekery as bone cakes — food that costs no meat. Meat goes to the Radiant Grotto as fungi.
3. Corruption & Territory
The world map is a grid of hex tiles. You start owning one: the Home Nest at the center. All territory growth happens in a fixed two-step sequence — you corrupt first, then upgrade to a full nest hex.
- Corruption (step 1) — a Corruption Growth is seeded on an empty hex touching a hex you already control (owned or corrupted) and ripens over about two minutes into a corrupted tile. There is no button for this: every owned hex quietly seeds one for free on a timer, and the Creeping Blight research adds a faster, paid accelerator on top (see the next page). Corrupted hexes count as yours for surrounding settlements and act as launch pads for further corruption, letting you creep across the map. Each paid growth costs bone meal and fungi.
- Expand Nest (step 2) — promote an already-corrupted hex into a full nest expansion. You cannot expand onto raw empty ground; the hex must be corrupted first. Costs bones and goblins, and the price ramps by 40% for each expansion you've already made. The build takes just under six minutes and can be cancelled mid-way for a full refund. A finished nest hex multiplies your Goblin Burrow and Barracks caps and acts as a launch point for raids — those are the only two caps it raises directly. Every other building's cap grows from corrupted ground instead, so the two levers are not interchangeable.
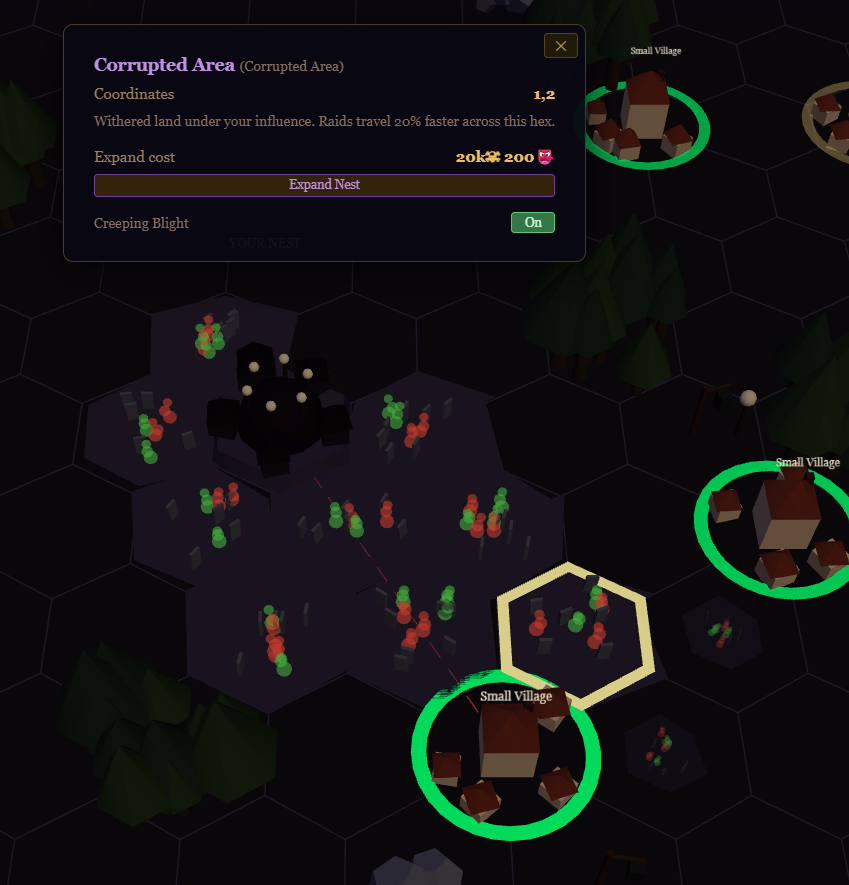
Why corrupt at all? Corruption is your cheap, fast-spreading footprint. You get no raid launches from a corrupted hex, but you extend your reach, encircle nearby villages, and — for every producer except the Spine-Piercery, which takes a single step — corrupted ground near your nests is what actually raises the building cap. Even the Coffee Shop and the Tinkerer's Warren grow this way; they just want far more hexes per building than anything else. This is your path to victory: a fully surrounded settlement — no route to open ground except through your territory — becomes a Larder. You only have to Larder one settlement to trigger the endgame: the ☠ Prime Target, the strongest settlement out at the map's rim. Everything closer is a stepping stone. You'll finish most maps with far more corrupted hexes than expansion hexes.
Painting a plan. The 🖌 Plan Corruption button under the Nest buttons puts the map into Plan Mode: drag across empty hexes to mark the corridor you want, drag back over a planned hex to un-mark it. Nothing is spent by planning — the plan is simply the queue your corruption works through first. Esc or ✓ Done leaves the mode, and the plan survives.
Caging costs you a battle. The moment a settlement is sealed in it makes a last stand: it is marked Defending, and when the next wave forms it conscripts a militia from its population — up to 60% of its full garrison, minus every defender you have already killed. That militia does not attack on its own: it rides the next wave, arriving with everyone else at countdown zero. Until the wave forms a defending settlement can still be raided, so thin its ranks first. Cage them one at a time and you fight the bill in instalments.
When to promote: upgrade a corrupted hex to a nest expansion when you specifically need more Burrows or Barracks, or a closer raid launch — not by default. Every promotion costs a big pile of bones and goblins.
The catch: Every owned or corrupted hex draws more enemy attention than an empty one — pigloids notice you spreading. Expand deliberately, not compulsively.
4. 🍄 Creeping Blight — corruption on autopilot
Once you research Creeping Blight (in the Blightcraft branch of the tech tree), your corruption starts spreading on its own. Every 10 seconds the blight seeds a Corruption Growth, if you can afford it — on a hex from your Corruption Plan first, and with nothing planned, on the reachable empty hex closest to a nest, so each nest grows its own ring of blight outward. Once every nest's ring is full, the automation stops: it never pushes at a settlement on its own. Paint a Corruption Plan (or build a nest expansion) to drive a corridor at the settlement you want to encircle — the encirclement that wins the run is always your call. This first tier buys you the automation itself, at the full bone meal and fungi price.
It is rationed, not free-running. Base Creeping Blight may only auto-corrupt one hex per wave interval; the follow-up nodes lift that ceiling and cut the price:
- Creeping Blight — 1 auto-corruption per wave interval, at full price.
- Fertile Rot — up to 3 per wave interval, 20% cheaper.
- Rampant Blight — up to 5 per wave interval, 50% cheaper.
That ration is per nest: the allowance is multiplied by one plus your expansion count, so every nest expansion widens the blight's budget along with everything else.
There is no way to corrupt a hex by hand — every Corrupted Area is laid by the free per-hex tick or by Creeping Blight. The ration is therefore a hard ceiling on how fast blight can spread, and a Corruption Plan is how you aim it.
Switching it off. The blight spends from the same bone meal and fungi stockpile you need for everything else, and each hex it claims adds to the footprint that feeds enemy waves. So it has an On/Off toggle, which sits in the Corruption Plan panel that opens with Plan Mode. Turn it off when you're saving up, when you'd rather choose your own direction of expansion, or when the next wave is already going to be more than you can handle. Turn it back on and it resumes on its next 10-second beat.
5. Threat & Waves
Two separate numbers drive the pigloids' response — don't confuse them:
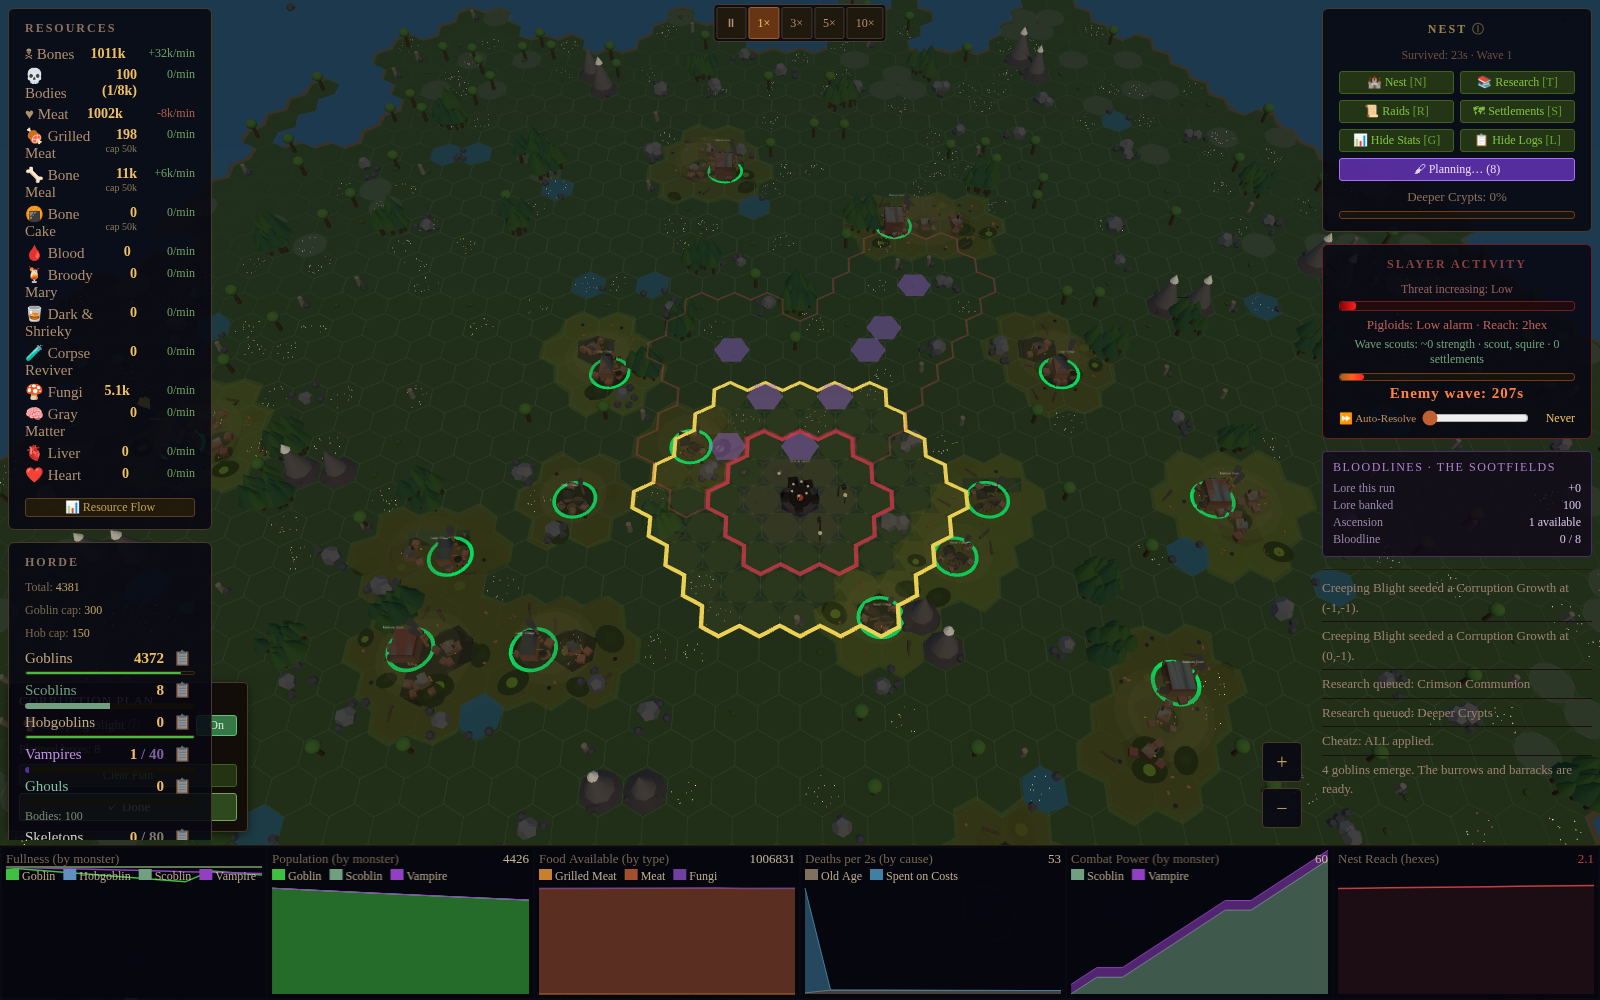
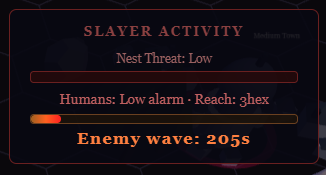
- Wave timer — a fixed countdown (~230s) shown in the Slayer Activity panel on the right. When it hits zero the muster sets out, and the battle opens when they arrive at your nest. No random delays, no early attacks. Every raid you finish, every building you place, happens against this clock.
- Threat — not a 0–100 score but a reach radius in hexes, projected from every hex you hold. It starts at 2 and banks one whole hex every ~345s (1.5 wave intervals), and it only ever grows: nothing you do adds to it and nothing takes it back. A wider reach pulls more distant settlements into the muster and raises the share of its fighters each one commits (10% at the start, up to 55% at the rim). The bar shows progress toward the next hex, and the arrows (> to >>>>) show how far the reach already stretches.
You cannot reduce threat, but you can slow the clock: Shadow Veil and Dark Forest research slow the accrual by 30% and 50%, and vampire feeding trips (Mesmerize, V for Vena) push the meter back without ever un-banking a hex.
When the wave fires, its size and composition are computed from a strength budget:
- Every hex in reach contributes — empty hexes a little, owned/corrupted hexes twice as much, plus a share of each settlement's fighters.
- The highest-tier settlement in reach unlocks stronger enemy types (knights → archers → mages).
Practical read: your reach only ever widens, so every wave is drawn from a bigger pool than the last. What you can shrink is what that pool contains — raid a settlement's fighters down, or thin its population enough to drop its tier — so between waves spend the time raiding rather than just stockpiling.
6. Combat: rows, tactics, pause & plan
When a wave arrives the world freezes and the battle board opens paused — that's your setup phase. A battle costs no game time at all, however long you deliberate, and nothing in the run advances until it is resolved.
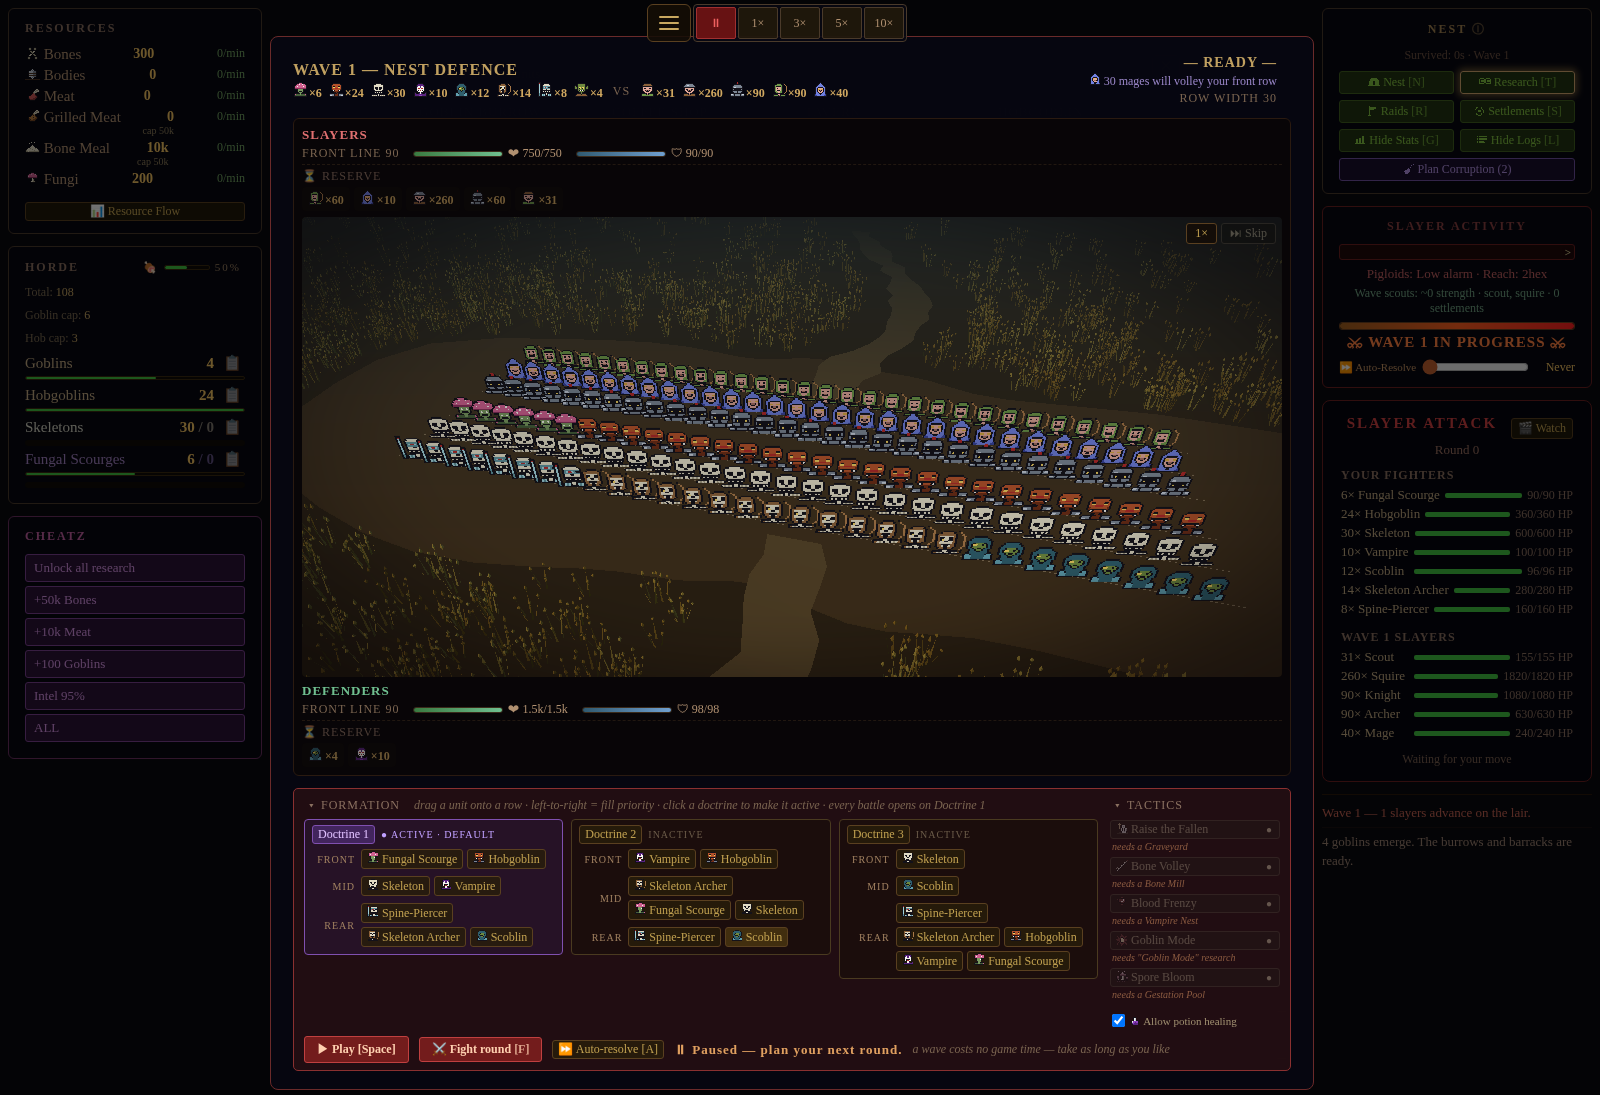
Each side fields up to three rows (front / mid / rear, 30 units per row; overflow queues as reserve), and every round resolves in three visible sub-turns:
- Volley — ranged units in any row (your Scoblins and Skeleton Archers; their Archers and Mages) fire at the nearest enemy row with living units. No sniping past it — with one exception: your Spine-Piercers ignore the rows entirely and put every shot into the single hardest-hitting enemy anywhere in their force.
- Clash — the two front rows fight in melee. Only the front row deals melee damage; mid/rear melee units are depth, not damage.
- Advance — the dead are cleared and thinned rows pull replacements: their own reserve first, then the row behind.
The battlefield is a small 3D scene: your rows stand nearer you, the slayers across the divider, and each round plays out on it — tracers for who fired at which row, damage numbers on whoever was hit, the fallen greyed out and sinking. Drag to pan and pinch or scroll to zoom in (you can never zoom out past the composed shot); with the battlefield focused, the arrow keys pan, + / - zoom and 0 resets, and ⌖ Reset view appears whenever you are off the default. Hover a unit (or tap it on a phone) for its health and what hit it. 1× / 2× / 4× speeds the animation up and ⏭ Skip jumps it to where the fight already is — it never fires a tactic. If the browser cannot draw the scene, the board says so and offers only Auto-resolve, Fight round and Continue.
Your formation doctrine (which species stands in which row, and in what fill order) persists between battles — you keep two saved doctrines and switch between them on the board while paused. Enemy formation is fixed, and which roster you face depends on the kingdom: pigloid armies stage knights/squires/scouts front, archers mid, mages rear, while the Deepwood fields wolves and bears and the Iron Crags fly. AoE (your Fungal Scourge, their Mages) spills into the row behind its target, so thin rows are dangerous. The Fungal Metastasis research doubles a Scourge's HP and adds two extra guaranteed strikes per clash into that same row behind its target.
Battle tactics are big per-battle buttons with limited charges (research adds more). There are five: Raise the Fallen (Graveyard + research — each enemy corpse dropped so far has a 60% chance to stand up as a Risen Ghoul on your front row), Bone Volley (Bone Mill — 2000 bones to rake any enemy row, the only way to hit their backline early; a Bloodline upgrade rakes them all, and another refills spent charges every few rounds), Blood Frenzy (Vampire Nest — for 5 rounds kills feed the force, vampires shed a quarter of their defence and every survivor heals 10% a round), Spore Bloom (Gestation Pool + research — 2000 Fungi to stop the enemy front row reinforcing for 2 rounds, 6 with Spore Saturation) and Goblin Mode (research — 2 rounds of double damage from everyone above 70% fullness, paid for with their hunger). Firing a tactic pauses playback so you see the result before resuming.
Press Play (or Space) to fight a round every few seconds; Pause any time to re-plan. After the fight, survivors come home hungry: each fighter owes a stretch of doubled hunger drain, so stock food before a big wave.
7. Raiding
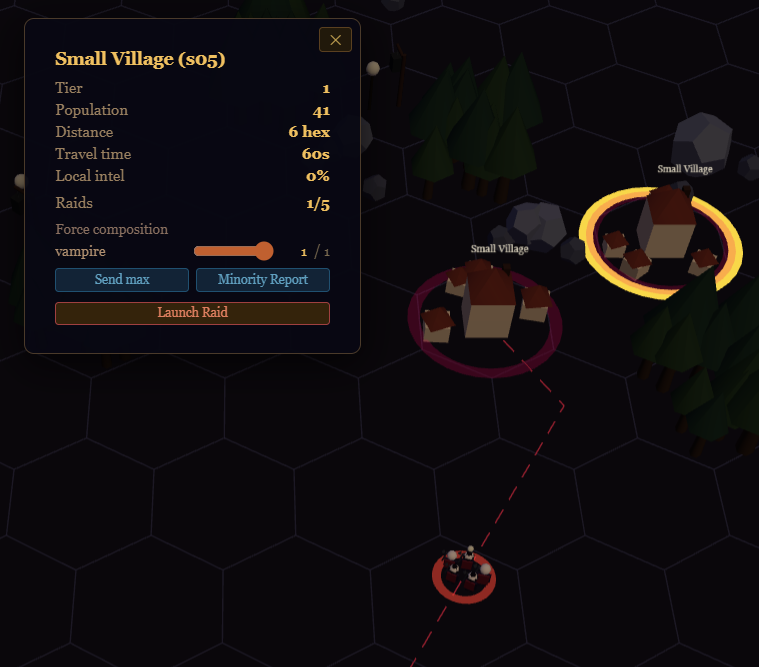
Raids are how you go on the offensive. From the world map or the Raids panel, pick a settlement, choose a squad of monsters, and send them out. The squad walks to the target, fights, loots, and walks back.
Why raid? Three reasons, in roughly this order:
- Weaken the next wave. Fighters you kill on a raid are fighters that won't be in the pigloid muster when the timer runs out. A single well-timed raid can turn a wave from unwinnable into trivial.
- Loot. Raids bring back bodies — three per fighter killed — which the Graveyard renders into meat, ghouls, blood for vampires, and bones.
- Long-term suppression. Repeated raids grind a settlement's population down, which drops its tier and lowers its future contribution to waves.
Costs and risks: Raiding monsters aren't at home — they're not defending the nest if a wave lands mid-raid. Travel time is real; don't send your whole army to the far corner of the map just before a wave. Underpowered squads die and you lose the bodies and the monsters.
8. Panels & Shortcuts
Everything you manage lives in a panel, and every panel has a one-key shortcut. The key is printed in brackets on the button that opens it, so you never have to memorise this page. Shortcuts work whenever a run is in progress; they're ignored while you're typing in a number box.
Every shortcut toggles: press it once to bring the panel up, press the same key again to put it away. Pressing a different panel's key switches straight to that panel. (The buttons themselves always open — only the keys close.)
The six buttons under Nest (top-right) drive the centre of the screen:
- Home Nest [N] — the building grid. Buy and upgrade Burrows, Taverns, Graveyards and the rest, and assign workers. Press it to snap back after poking around the map.
- Research [T] — the tech tree. Queue nodes, see what's in progress, and re-queue repeatable nodes. Research points are brewed by goblins staffing Coffee Shops, so an unstaffed shop means a stalled tree.
- Raids [R] — raid automation and the full raid history. Slide how many auto-raids may run at once (0 = off) and toggle Minority Report. There is no squad composition to set: every auto-raid marches with all idle Hobgoblins — plus every idle skeleton, Skeleton Archer and Spine-Piercer once Bone Levy is researched — and never vampires or scoblins.
- Settlements [S] — a read-only table of every settlement, weakest first: tier, population, distance, local intel, known defenders and projected loot. The ☠ row is the Prime Target — the one you must Larder to call down the final wave, which you must then beat, to win. Click a row to open that settlement and actually launch a raid.
- Stats [G] — toggles the graph panel (hunger, food, combat strength, threat by source). "G" for graphs, since T was taken.
- Logs [L] — toggles the running event log down the left side.
Two more panels are opened from elsewhere in the HUD:
- Resource Flow [F] — button at the bottom of the Resources list. A diagram of where every resource comes from and what consumes it; click a node to set that resource's consumer priorities.
- Scouting Trips [C] — button on the Monster Intel card. Live scoblin trips (outbound, watching, walking home) plus the history of completed trips. Intel gathered here is what unlocks win-chance projections and Minority Report.
And the universal keys:
- How to Play [H] — this guide; press H again to close it. You can also click the Nest heading (the one with the ⓘ) at any time.
- Space — pause / resume. 1 · 2 · 3 · 4 — game speed ×1, ×3, ×5, ×10.
- Esc — close the topmost thing that's open, one layer at a time, ending with the centre panel.
9. Research
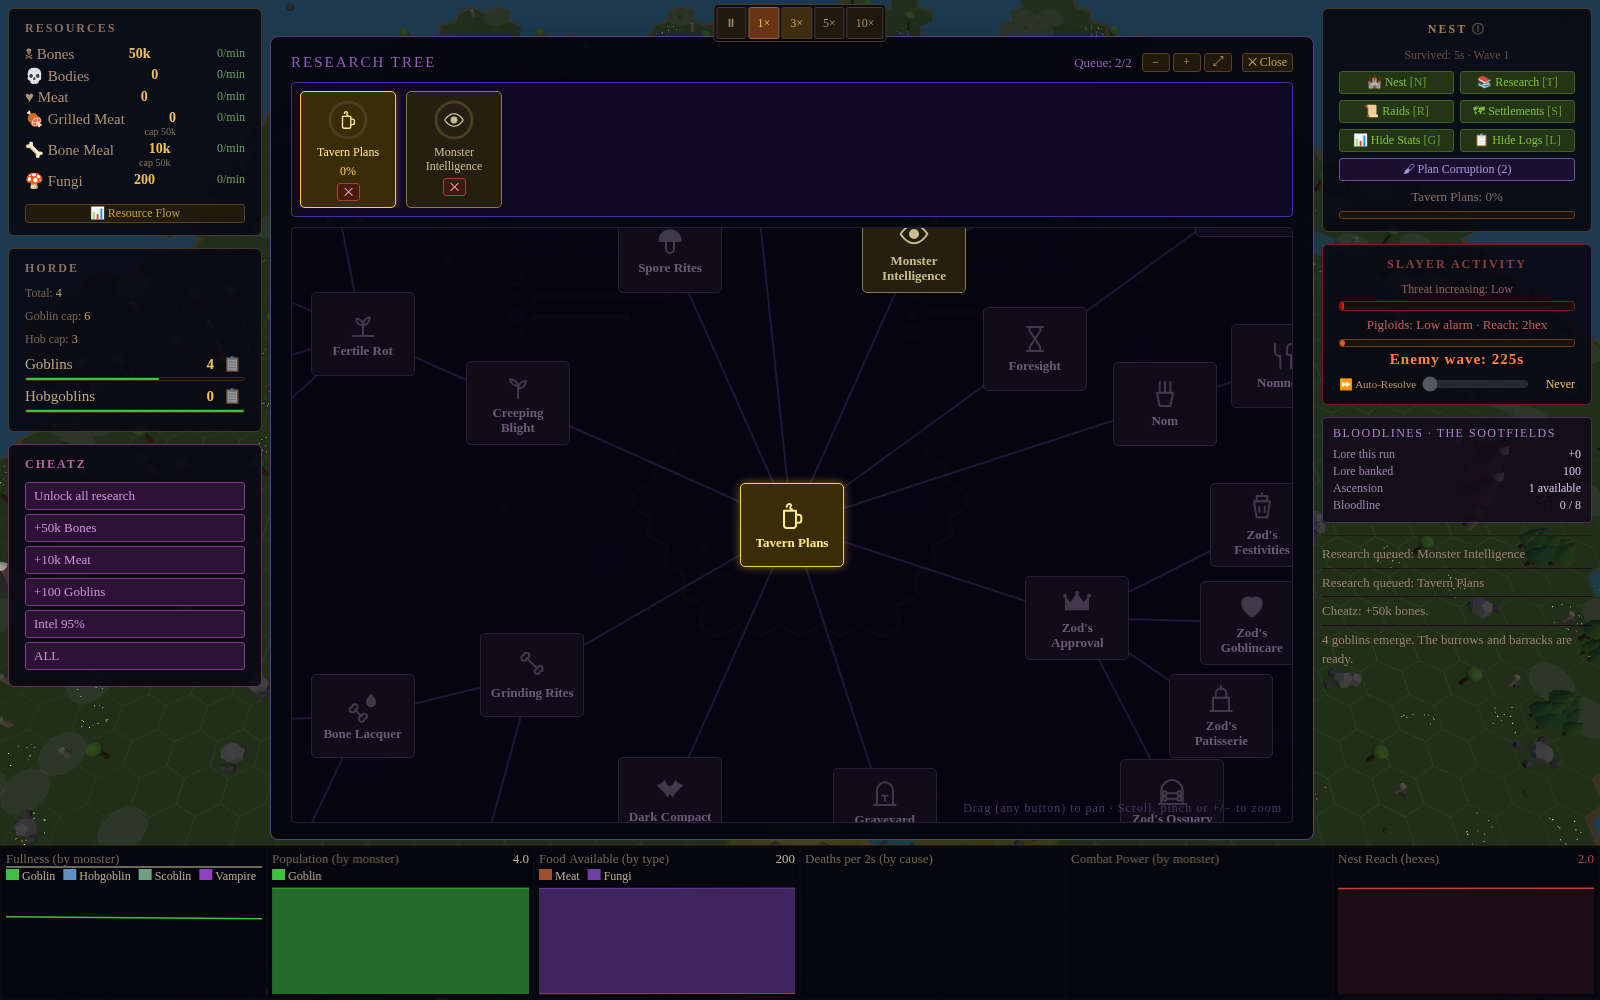
Research is the run's other economy. Goblins staffing your Coffee Shops brew the research points — half a point per second per barista, so a fully staffed first shop of 10 makes 5 a second — and the tree only advances while those seats are filled. The 📚 Research [T] button opens it, and clicking a node queues it. The queue works top to bottom, one node at a time, and you can queue a node whose prerequisite is still in the queue ahead of it — so you can lay out a whole plan in one visit and walk away.
The tree is a forest: there is no single root any more, so every branch — food and the Coffee Shop, intel and raid automation, blightcraft, the graveyard's organ line, bones and skeletons, vampires — is open to you from the opening turn. A node is clickable when you can afford to start it and its prerequisite is earned or queued; the rest are drawn dimmed so you can see where a branch leads before you commit.
What to take first
- Foresight — take it early. It lifts the research queue from 2 nodes to 5 (and Prescience later takes it to 10), so you can lay out a long plan in one visit instead of coming back every time a node finishes.
- Automated Raids — the next milestone worth aiming at. Once raids run themselves you stop hand-launching every one of them and the whole mid-game opens up; set the concurrent-raid slider in Raids [R] and let idle Hobgoblins earn their keep.
- After that, follow whichever engine is bottlenecking you: Creeping Blight if your corridor is crawling, the Coffee Shop line if your goblins are idle, the bone line if your fighters are dying.
The Tinkerer's Warren is a second, separate bench of repeatable upgrades, unlocked from the tree. It has its own queue and never competes with the tree above for slots.
10. How You Win
A settlement becomes a Larder when it is fully surrounded by your territory — its escape routes to open ground are all sealed by owned or corrupted hexes (rocks and other settlements count as walls, but only your presence actually cages them). Once caged, a settlement stops sending fighters and becomes a passive supply of bodies for your nest.
Cage the Prime Target and the map answers as one. Your reach jumps straight to the map's rim — every settlement is in the muster from then on — every settlement still standing makes a last stand — it conscripts a militia from its population, the Prime Target itself up to 120% of its full garrison — and all of it marches in the next scheduled wave. Until it forms they can still be raided. You get the full ~230s countdown to prepare, and you can watch them come. That wave is the last fight of the run: beat it and you win; lose and the nest falls. Bleeding the Prime Target dry with raids no longer wins on the cage alone — it only means the target itself adds little to the army the rest of the map sends.
Read this as a strategy directive, not a bonus objective. Waves and raids matter — but the whole game is really a race to drive a corridor of corruption out to the Prime Target and cage it before the pigloids grind you down. Every corruption and every expansion is progress toward that; a raid that doesn't ultimately clear the path is just buying time.
Practical checklist:
- Open Settlements [S] and find the ☠ row.Find the hovering gold marker on the map. That's the one that ends the run — note its distance.
- Larder the villages and towns on the way out. They're not win requirements, but each one you cage stops feeding waves, hands you a body supply, and gives you safe ground to corrupt from. Each cage makes the next wave heavier — cage them one at a time, not all in the same cycle.
- The mid-map ring is thick with Towns, well above village strength. Don't try to walk past one without first knocking its garrison down with raids.
- Corrupt the empty hexes around the Prime Target. Use rocks and other settlements as "free walls" — you only need to plug the gaps, and a grown settlement's footprint means a lot of gaps.
- Raid down the whole map before you seal the Prime Target, not just the target. Every settlement still standing contributes 120% of its remaining defenders to the final wave, so a fat town you never touched is worth more to the enemy than the capital you bled dry.
- The instant the last escape route seals, your reach jumps to the map's rim and the countdown reloads to a full interval. Spend it: that one battle is the run.
Close this dialog and press Enter the Dark when you're ready.
More guides on the wiki (opens in a new tab)